
Here’s your step-by-step guide on how to collect your sample. Follow our video and written guide.
Three main steps
- Prepare your kit
- Collect your sample
- Label and post it
Before you start
Take your test in the morning – fasting for 8 hours increases the accuracy of your results
Drink a glass of water 30 mins before taking your sample
Take your sample Mon – Thurs so that your sample will be delivered to the lab by the next day
Use a low table to take your sample or stand if possible
You’re ready to do your test!
Follow along with our Medical Director, Dr. Earim
1. Prepare your kit
Drink a glass of water 30 mins before taking your sample.
Prepare your kit by laying down all of the contents within your order.
Not all tests have two tubes. If you only have one do not worry, it means that only one is needed for your test.
Get your blood flowing
To get your blood pumping we recommend some light exercise for 1 minute. Consider running on the spot, star jumps, or swinging your arm around.
Soak your hand in hot water for 3 minutes. This will encourage your blood to flow to your hand.
2. Collect your sample
We recommend standing when taking your sample if possible. If you are seated, try to use a low table. Gravity will help your blood to flow, and make your sample collection much easier.
Ensure your tube(s) are standing upright. There are two holes within your plastic transport case, pop your tube(s) in these to keep them upright and steady.
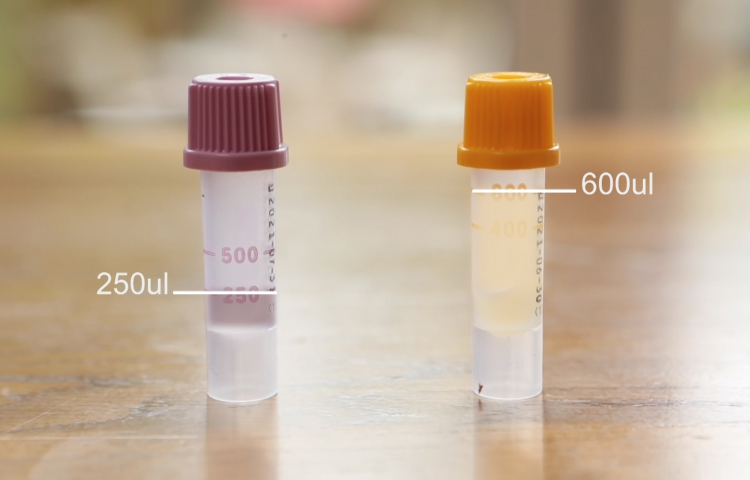
This is how much you will have to fill the tubes:
- Yellow tube: fill to the line marked 600
- Purple tube: fill to the line marked 250 (if your kit only contains a yellow tube, don’t worry, you just need to fill one)
If you have both a yellow and a purple tube, start filling the purple tube first.
Not all tests have two tubes. If you only have one do not worry, it means that only one is needed for your test.
Clean your finger with the alcohol wipe.
Take your lancet and remove the top by twisting it.
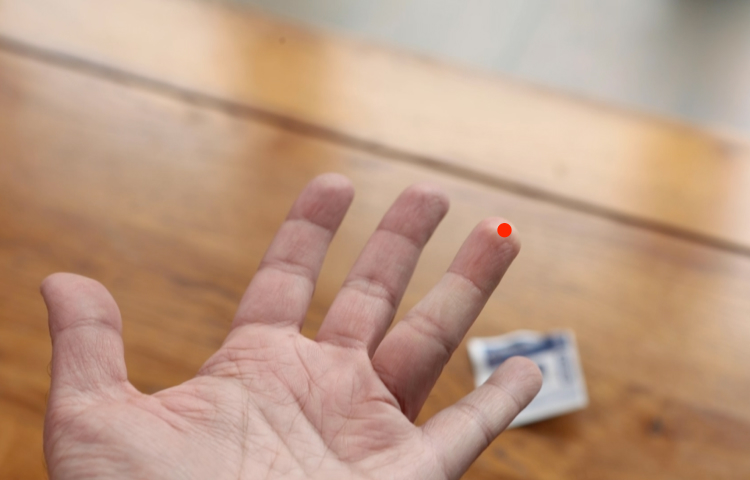
It’s important to prick the corner of your fingertip as it’s less sensitive and makes it easier to direct your blood.
Put your hand on a hard surface, so that it doesn’t move when you push the lancet down. Then place the lancet on the top corner of the fingertip.
Push the lancet down until you hear a click.
Once your blood is flowing, tap or scrape the drops of blood against the top of the tube to help guide it in.
It should take no more than two minutes to fill a tube.
Immediately after, put the cap on the tube and press until you hear a click. Gently turn it upside down and then upright. Repeat a few times before moving onto the next tube if you have one.
3. Label and post it
Now, fill in the lab request form with the following:
- Add the date and time that you took your sample to the middle of the form
- Complete both labels at the bottom of the form with the same information
Wrap the labels at the bottom of the form around the tube(s) and stick the ends together onto themselves like an airport luggage tag. Place your labelled tubes in the plastic case provided.
Before posting, make sure that your prepaid envelope contains:
- Completed lab request form
- Labelled tube(s) placed inside the plastic case
Be sure to post your sample on the same day.
Post your sample in a priority postbox, as they’re collected from every day. Find your nearest priority postbox here.
Your results should be with you in a few days.


